Direct a 30-second Seedance 2.5 scene with a nine-shot storyboard
Assign separate roles to storyboard, location, and character references, then build a timed 30-second dramatic sequence.
Plan a 30-second scene in nine shots: a robot and an elderly woman watch a rocket launch, the rocket breaks apart, and the robot shelters her from falling debris. Use a nine-panel storyboard for shot order and separate images for the characters and location.
Give each reference a specific job. The storyboard controls the planned sequence. A landscape reference supplies the setting and light. Two character sheets supply appearance. The prompt connects those four inputs and assigns time to the action.
Send the four references and a timed directing brief to seedance-2-5 through VizoAPI’s POST /v1/generations endpoint. The Seedance API page lists the resolutions and per-second rates of Seedance 2.5 and 2.0.
1. Build four reference roles
Prepare the reference set before composing the timed prompt. List the four images in input.content in the order below, with role: "reference_image" for each. Give every picture a distinct purpose.
| Image order | Responsibility | Keep out of that responsibility |
|---|---|---|
| Image 1 | Nine-shot storyboard: order, framing, and camera plan | Final drawing style |
| Image 2 | Launch-site landscape and dusk lighting | Character appearance |
| Image 3 | Robot design | Background composition |
| Image 4 | Elderly woman’s appearance and costume | Shot order |
The clips and frames here are from ByteDance’s own example.
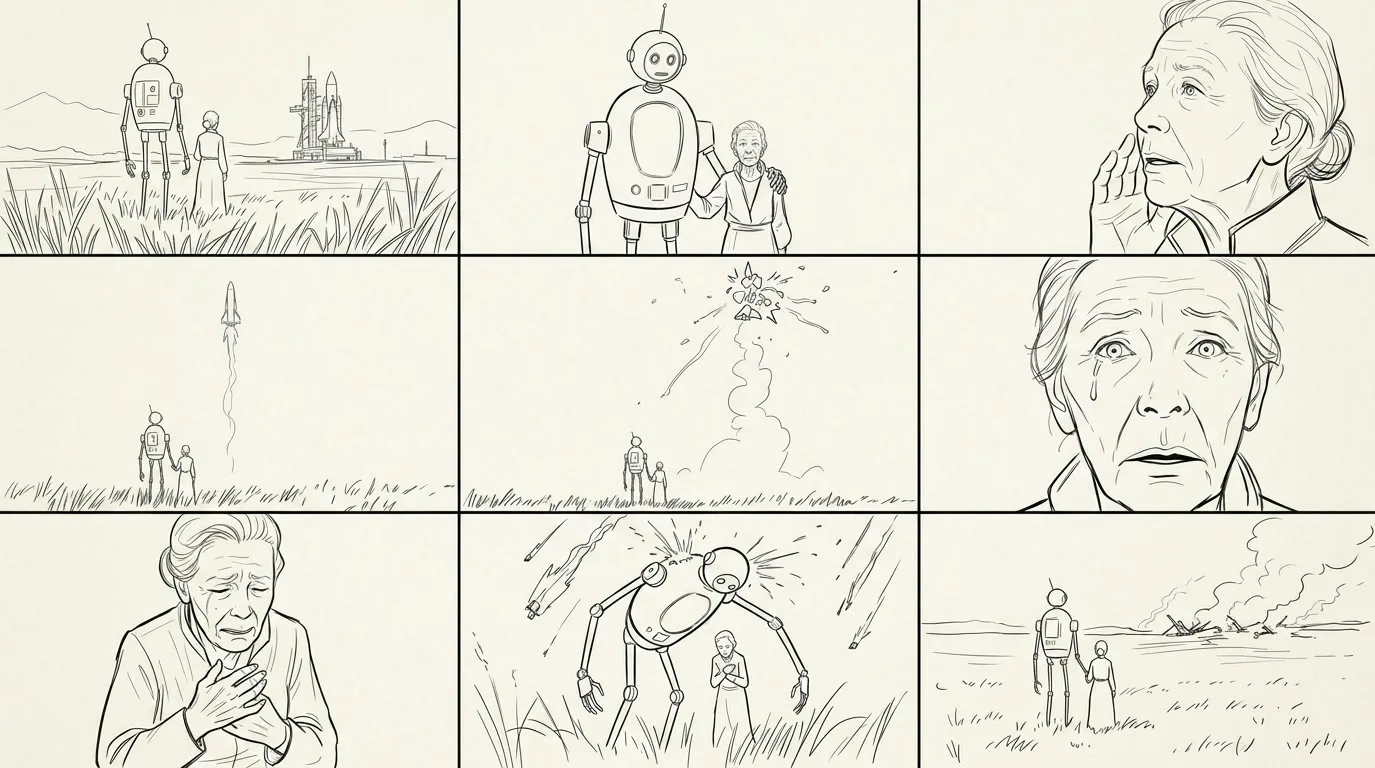
Keep the storyboard simple enough to read at a glance. In this example, each panel has a distinct narrative purpose: establish the location, introduce the pair, show the woman’s anticipation, launch the rocket, reveal the disaster, register her reaction, deepen that reaction, show protection, and end on the pair together.
That sequence gives the emotional close-ups a reason to exist. A reaction shot follows something the viewer has seen happen.
2. Separate the finished look from the line drawing
The storyboard uses line art. Use a photographic film look for the finished scene. Tell the model which asset defines each of those jobs.
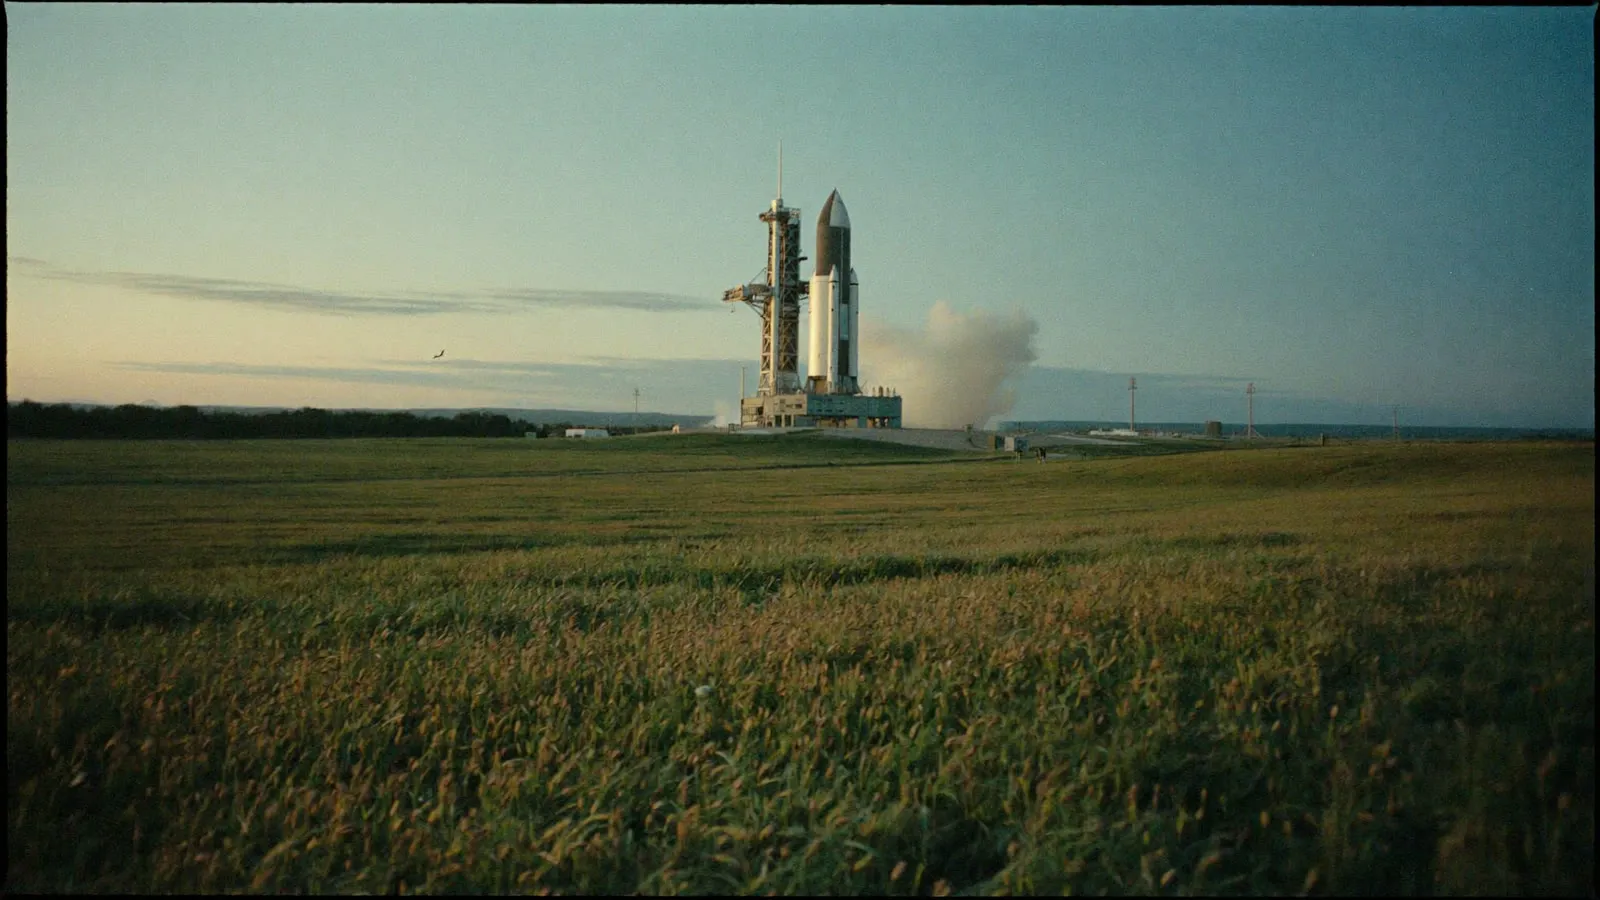
Use the landscape to specify the horizon, open space, and color. Then define the character appearance independently.
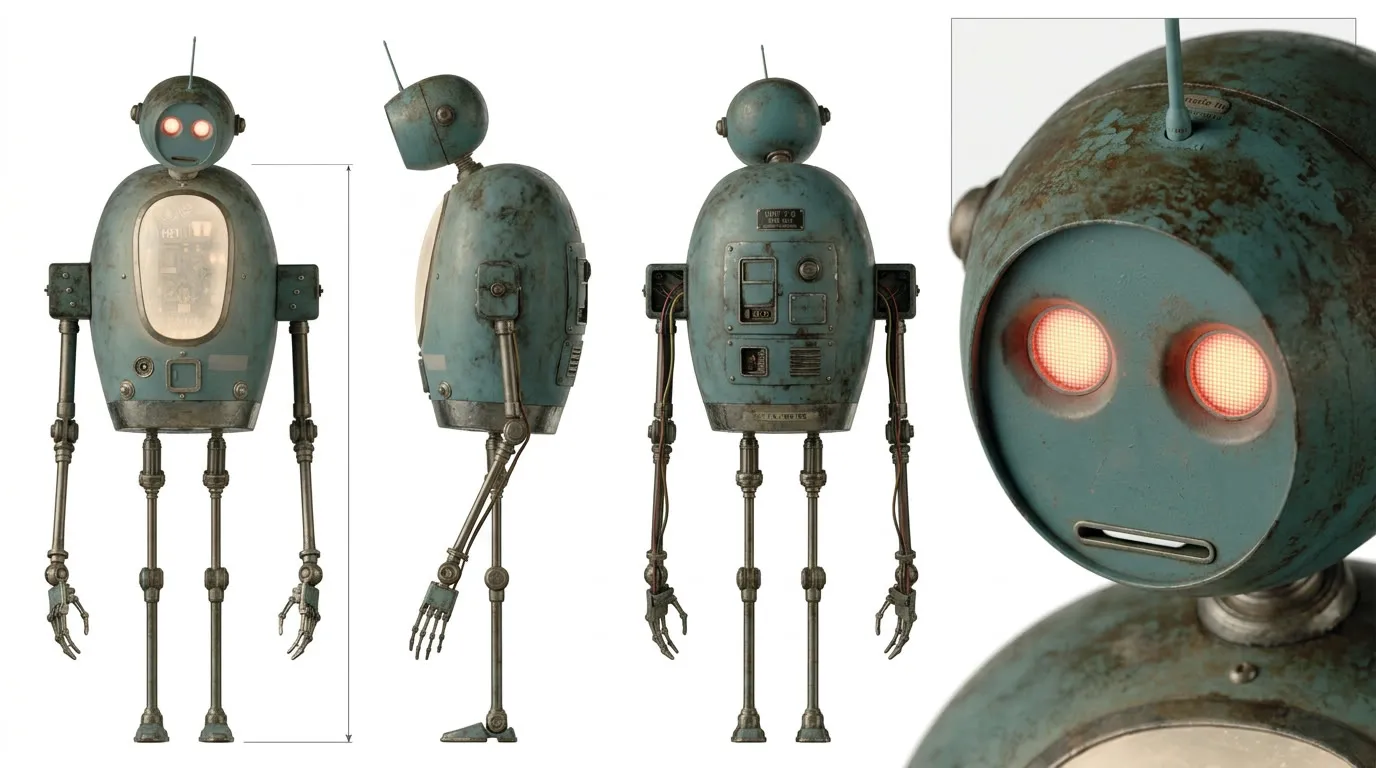
Choose a few markers you can inspect throughout the video. Here they include the robot’s dome-shaped head, red-orange eyes, teal metal, and narrow limbs. A wide shot will not show every detail, but it should preserve the silhouette and relative size.
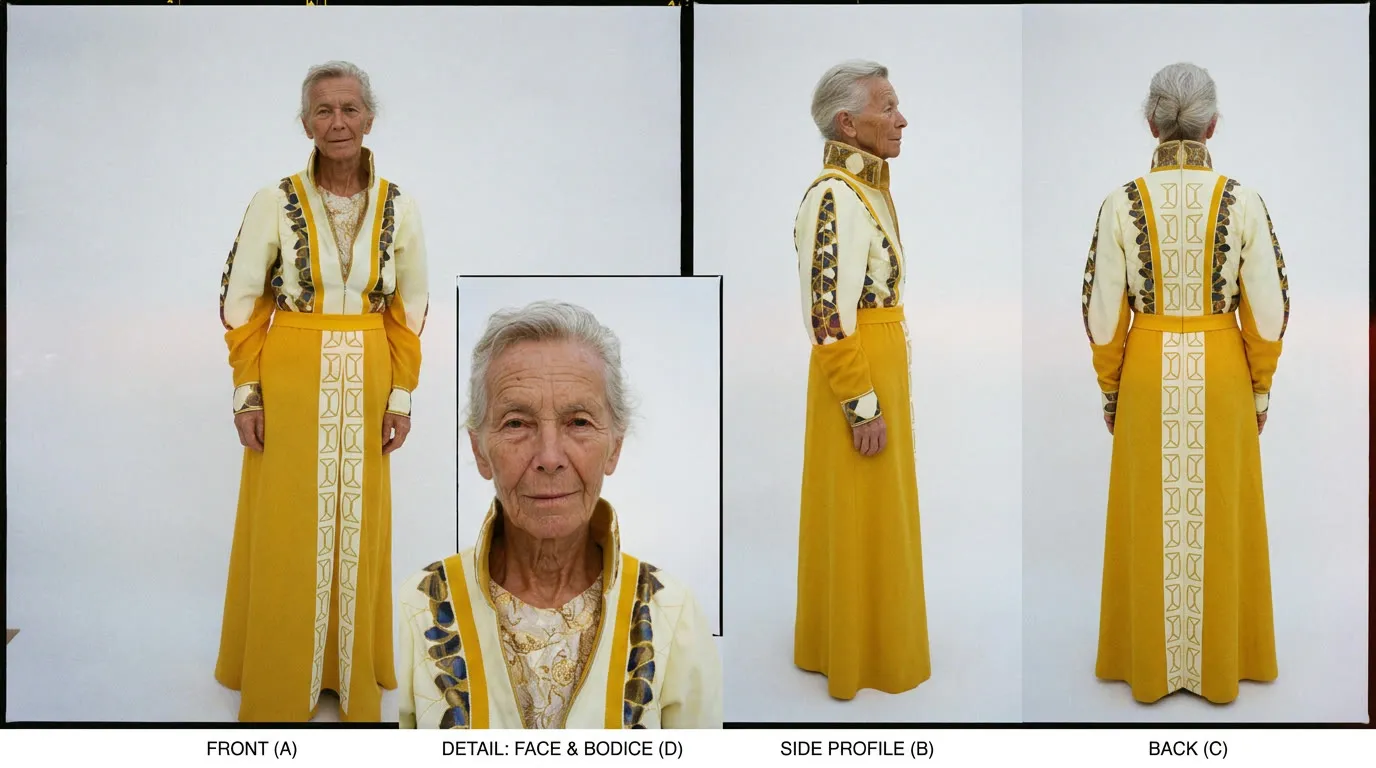
Attach the character sheets as reference-image items, just like the storyboard and landscape. Use your own permitted character artwork, with the face and costume visible enough to compare after generation.
3. Set the length and frame before writing shots
This example is a landscape scene. The launch site, characters, and falling debris need room within the same frame.
| Parameter | Specification |
|---|---|
model |
seedance-2-5 |
| Task | Reference-based video generation |
input.duration |
30 seconds |
input.ratio |
"16:9" |
input.resolution |
"720p" |
input.generate_audio |
true, for dialogue and scene sound |
| Inputs | One storyboard, one setting image, two character sheets |
| Dedicated first/last-frame roles | Not used in this reference setup |
Use a 1280 × 720 landscape frame, matching the clip shown here. Fit all nine shots into 30 seconds at 16:9.
Send the following body to POST /v1/generations. Replace the placeholder URLs with accessible HTTPS URLs for your images, and replace the short text value with the full timed brief in step 4. The storyboard URL is a placeholder. The storyboard, landscape, robot sheet, and woman’s sheet are all image items; their different creative responsibilities belong in the prompt.
{
  "model": "seedance-2-5",
  "input": {
    "content": [
      {"type": "text", "text": "Use the nine-panel storyboard for shot order, the launch-site landscape for setting, the robot sheet for the robot, and the elderly woman's sheet for her appearance. Create a 30-second scene with dialogue and sound."},
      {"type": "image_url", "image_url": {"url": "https://example.com/storyboard.jpg"}, "role": "reference_image"},
      {"type": "image_url", "image_url": {"url": "https://example.com/landscape.jpg"}, "role": "reference_image"},
      {"type": "image_url", "image_url": {"url": "https://example.com/robot.jpg"}, "role": "reference_image"},
      {"type": "image_url", "image_url": {"url": "https://example.com/woman.jpg"}, "role": "reference_image"}
    ],
    "duration": 30,
    "ratio": "16:9",
    "resolution": "720p",
    "generate_audio": true
  }
}
Keep model at the outer level. Seedance 2.5 accepts integer durations from 4 to 30 seconds, and resolution can be 480p, 720p, or 1080p. This request uses four of the permitted 30 images. Its 30-second duration uses the upper limit, so add no extra scene after the ending without changing the plan.
A storyboard supplied as reference_image guides the scene. A dedicated first_frame or last_frame has a different role and cannot be combined with these reference images in the same request. To use endpoint frames, make a separate request, supply a first frame as well as a last frame, and use ratio: "adaptive" for Seedance 2.5. There is no per-panel timing field for the storyboard; put the timeline in the text and review the resulting cuts.
Keep these four images together while you revise. Compare the resulting cuts with the nine panels to find missing or reordered shots.
4. Put asset responsibilities before the timeline
Start the prompt by explaining the four attached images. The API spec defines no special reference-tag syntax; describe each picture’s responsibility in the text. Next, state the overall visual treatment. Then write the timed action in that same text content item.
Give each interval one main event. Keep the setting and character instructions ahead of the timed shots so they apply throughout.
Use the nine-panel storyboard to plan nine shots in order. Use the
launch-site landscape for the setting and dusk light, the robot sheet
for the tall, weathered teal robot, and the elderly woman's character
sheet for her appearance and yellow dress.

Create a realistic color-film scene in 16:9. Retain the characters' designs
throughout. Use warm sunset light against the cooler evening sky, subtle
film grain, shallow focus, and handheld camera movement. Render a finished
scene rather than the storyboard's line-art appearance.

0-3s: Establish the grassland from a very low, distant viewpoint. The pair
stand small beneath the broad sky, watching a rocket on the horizon.

3-6s: Move to an eye-level medium view. The robot supports the woman's
elbow while they look up. Its spoken reassurance is gentle and in English.

6-10s: Show the woman's face from slightly below. She smiles sadly and
speaks an English farewell to the person aboard the rocket.

10-14s: Return to the distant launch. Tilt upward with the rising rocket.
Build the engine sound as its trail crosses the dusk sky.

14-18s: The rocket breaks apart high above the horizon. Shake the handheld
view with the shock. Let the explosion give way to sudden quiet.

18-22s: Hold close on the woman's disbelief. A tear crosses her face.

22-25s: Her grief breaks into sobbing. She clutches her chest and pleads
in English for the person aboard to return.

25-28s: From a very low angle, show the robot bending over her. Its arms
form a shelter as burning fragments fall and strike its metal back.

28-30s: End on a distant rear view. The pair hold each other beneath the
fading sky. Pull back slowly as wind and a restrained piano note return.
Keep the time ranges continuous. Every interval starts where the previous one ends. The allocation also reserves several seconds for reaction, which is part of the scene rather than spare time between action shots.
If you write dialogue for your own production, read each line aloud within its allocated interval before generating. The closing two seconds should not carry an entire speech.
5. Review character identity at the first dialogue shot
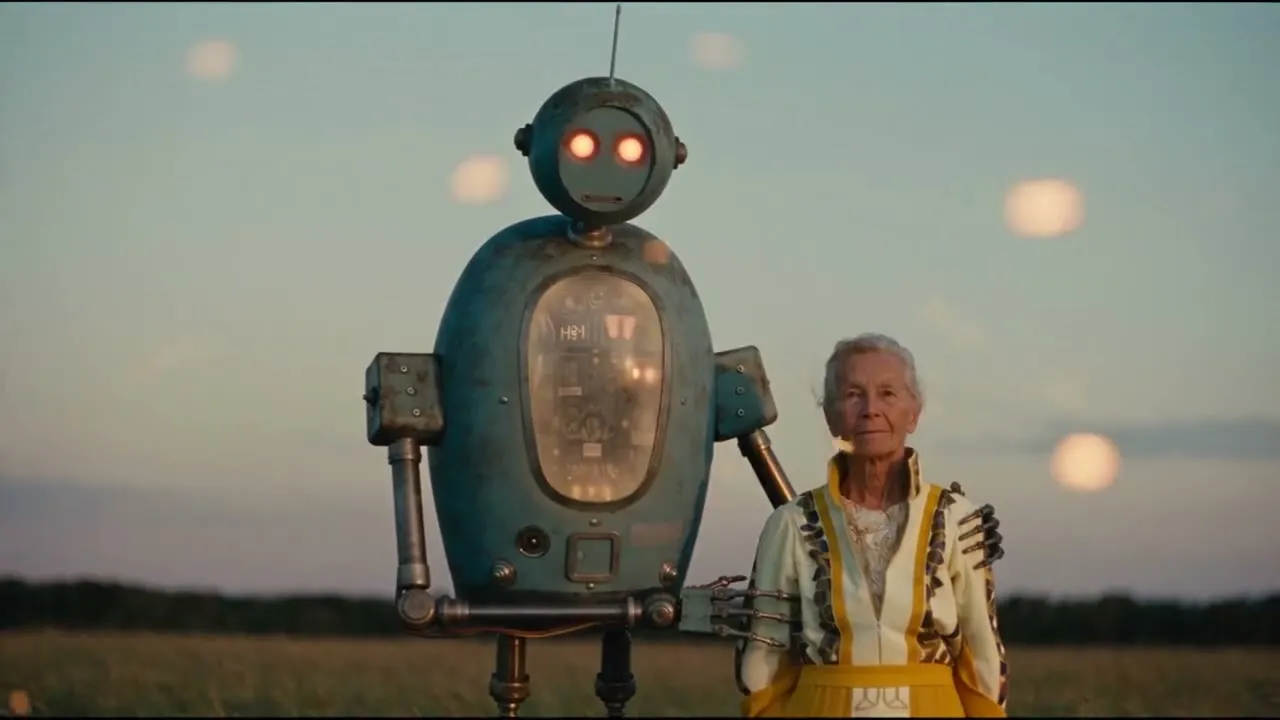
Compare this view with the two character sheets. Check the woman’s yellow dress, the robot’s body shape, and their relative height. These are the details the viewer will carry into the later wide shots.
Listen separately for speaker assignment. A visually correct pair can still need audio work if a line comes from the wrong character or at the wrong moment. This request asks for generated audio without a voice reference. If you add one, attach an audio_url item with its URL in audio_url.url and role: "reference_audio", then describe the intended speaker in the text. Seedance 2.5 accepts up to ten audio items, but the role does not guarantee the correct speaker; review the voices and delivery.
Do the same check after each major cut. Continuity review is easier when you compare the same handful of visible markers throughout the sequence.
6. Check scale and geography during the launch
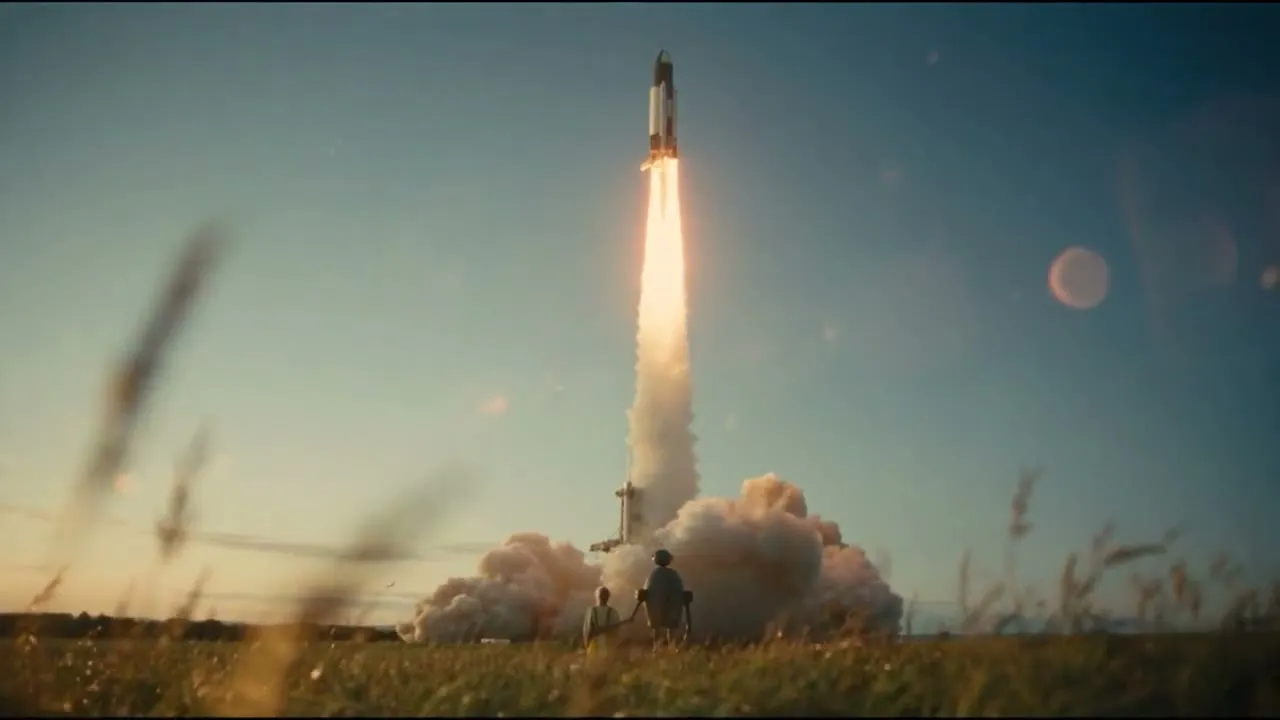
Keep the launch distant from the pair when reviewing your version. The close-ups, launch view, and disaster should feel like parts of the same place.
Check the camera instruction too. The launch shot requests an upward tilt following the rocket. If a generated scene instead jumps to a new aerial viewpoint, decide whether that change serves your story before accepting it.
For a missed event, return to the relevant interval. Remove competing action or give the event more time. Increasing the number of visual adjectives will not resolve an overloaded schedule.
7. Judge the protection beat in motion
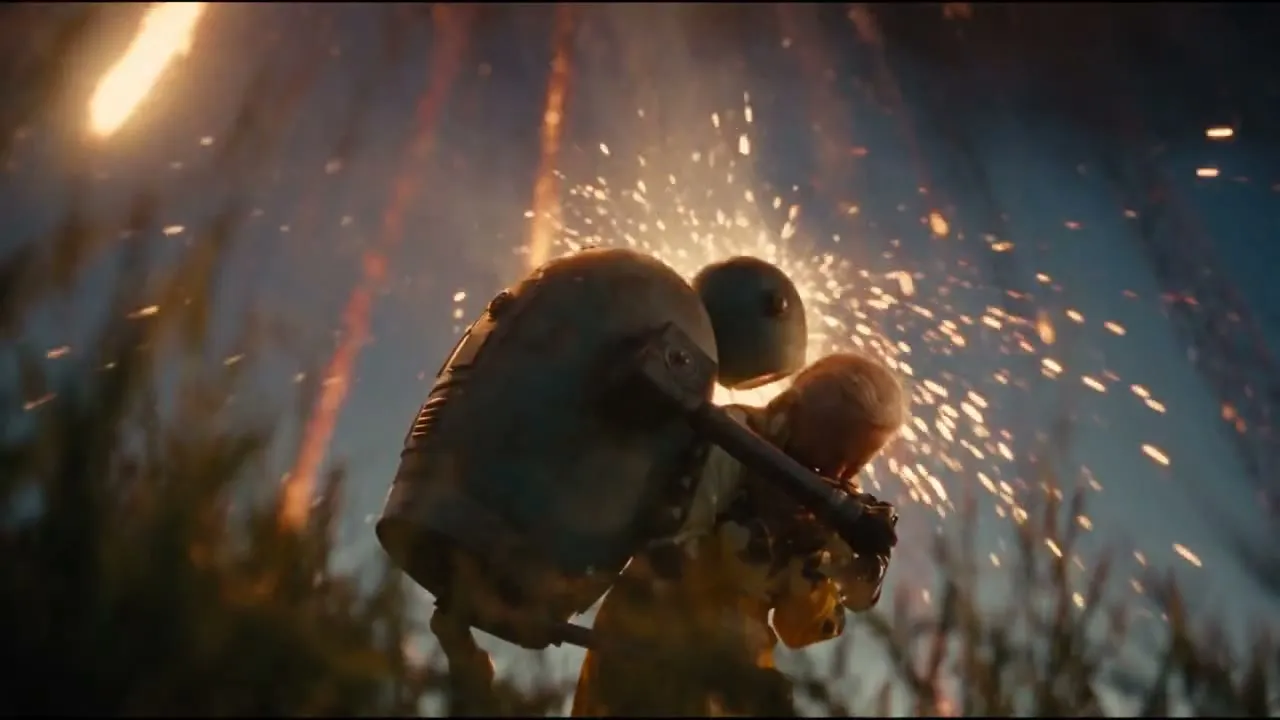
Play through the embrace and debris. Inspect whether the arms continue to belong to the robot, whether the woman remains in the same position, and whether the protective action is readable at normal speed.
Then review the ending with sound. The final wide shot should give the scene time to settle after the debris. To change a missed action, revise the prompt and submit another generation with the same four images.
This request creates a scene from still images. If you later use a video as an input, Seedance 2.5 requires a video_url content item with role: "reference_video" and an omni_reference_task_type of reference, edit, or extend. An edit request requires duration: -1; edit and extend require an adaptive ratio. Keep that separate from this four-image generation. For exact cut placement in an accepted clip, use a video editor.
Save the accepted request body with the exported video so the next scene starts from a documented character and location setup.